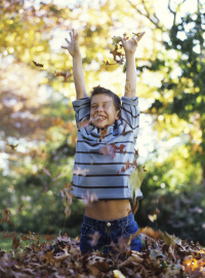
Sensory Toolkit
For a child with sensory needs,
facing even everyday situations can be a challenge. Occupational therapists
often suggest sensory diets and sensory breaks to help these children cope with
the sensory demands of daily activities and learn new skills to help make
“sense” of the world around them. The following are some activities to try at
home to help your child explore new sensory experiences.
|
-- Tactile - Dry - Sensory bin with dry beans, corn, rice, etc. - Grass, tree bark, leaves, pinecones, rocks - Fabrics with a variety of textures, from smooth silk to rough carpet - Ball pit or packing peanuts - Wet and messy - Pudding or yogurt sensory bin - Shaving cream or whipped cream – draw shapes, letters, etc. - Finger paints, tub paints - Tip: an empty bathtub makes a great place to contain messy play! - “In between” - Playdough, clay, moon sand - Cooked noodles (can be dyed different colors with food coloring for more fun!) - Theraputty - Waterbeads -- Proprioceptive - Make a “burrito” – roll your child snugly in a blanket or make a “sandwich” between big pillows - Jump on a trampoline, skip rope, or play hopscotch - Push or pull heavy objects like a grocery cart or do wall push ups -- Vestibular - Swing on a swing, trying both front to back and side to side - Spin, such as on a Sit n’ Spin or in an office chair - Play upside down, such as on playground equipment -- Auditory - Listen to natural sounds, either outside or on a recording - Play a listening game, such as trying to identify sounds and where they are coming from - Listen to calm, gentle music - Play a musical instrument - Give your child some control over normally upsetting sounds, such as letting your child pop balloons or run the vacuum cleaner |
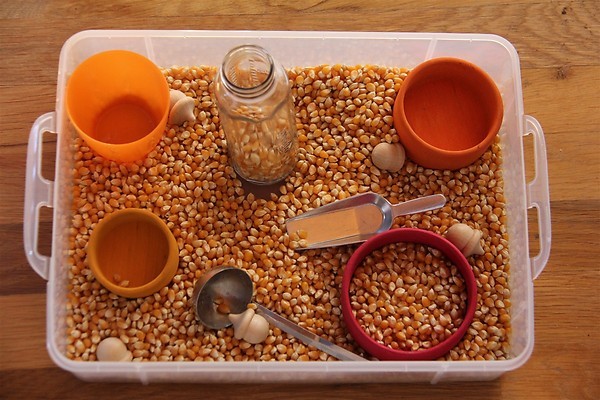
image retrieved from http://chasingcheerios.blogspot.com/2012/11/fall-sensory-bin.html
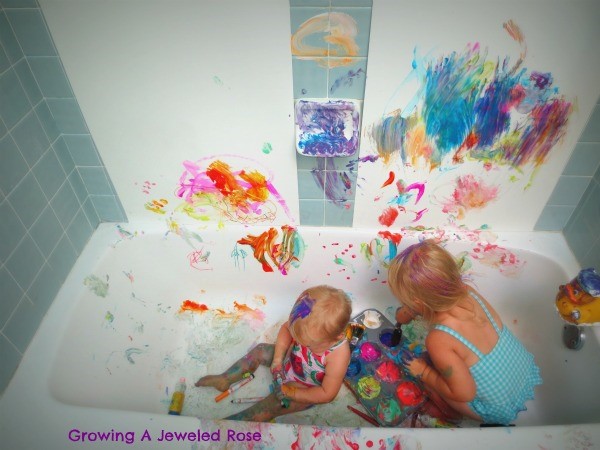
image retrieved from http://handsonaswegrow.com/10-tips-to-keep-messy-play-clean/
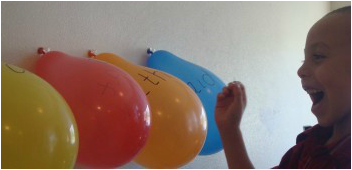
image retrieved from http://discoverexplorelearn.com/sight-word-balloon-pop/
|
Indoor Sensory fun!
Strategies
for Teaching Your Child to Use Utensils
2/4/2015
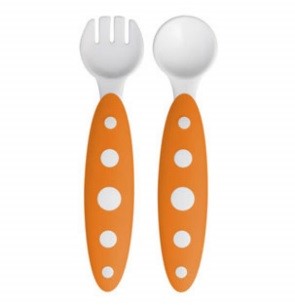
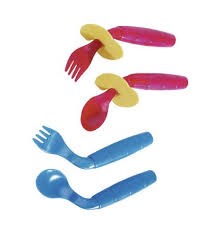
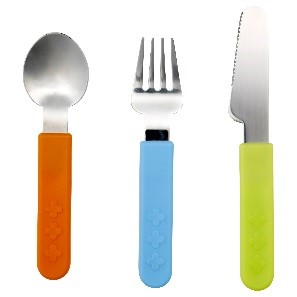
Choosing the Right Utensil
There are a variety of options when choosing utensils. Some have a curved handle for those children who have trouble with wrist movement. There are utensils with a flat bowl which can help if your child has low tone and poor lip strength. Short utensils help with coordinating holding and targeting the mouth. Utensils with loops (www.Flaghouse.com) teach correct grasp on the utensil. The ones pictured are specific to right handed children.
Best Times and Best Ways for Practice
Initially, I like to practice away from food when there’s no pressure for your child. That might include:
- Scooping beads
from bowl to bowl. Start with beads that
are not round so that they don’t roll off the spoon.
- Scoop dirt from a
bowl to a flower pot.
- Play Doh is a
super source for practicing utensils.
- In the bathtub,
use a larger spoon to scoop bubbles or water.
When starting to use utensils with food, talk to your child about how to use the utensil as you’re eating. Being a good model is a great way to start. Pudding consistencies (yogurt, mashed potatoes, oatmeal) cling to the spoon which helps control the food as your child moves the spoon to his mouth. Try letting your child feed you a few bites each meal to get him interested if that helps.
Start small and celebrate each bite. Have two bowls at the table. One that is designated for self-feeding and one for adult-assisted feeding. That makes a game out of your child feeding himself plus allows for a rest between bites. You may want to use a bowl that suctions to the table surface is help control the bowl. As your child becomes more comfortable feeding himself and the process goes more smoothly, increase the amount in the self-feeding bowl and reduce the amount in the adult bowl until your child is eating everything on his own!
Stabbing with a fork is the next developmental stage after using a spoon. Again, practice with Play Doh or rolled cookie dough prior to using a fork for eating. At the table, start with easy to manage foods such as penne pasta, Jello jigglers, or pieces of a bagel.
The last utensil will be a butter knife. Children can start by spreading and work up to cutting soft foods. Using a knife is a more difficult skill and requires lots of practice. Be sure to teach knife safety along with how to use a knife.
You may need to do some guided practice in the early stages but be sure to give your child the opportunity to practice a portion of each meal on his own. Have a wet cloth nearby for those spills; they will happen. Let your child know it’s okay and keep going. Allow more time per meal and practice when you’re not in a hurry. Having you or your child leaving the meal frustrated will hinder your success. Be positive! Celebrate small steps!
YOGA for Kids 1/30/2015
What
Exactly is Yoga?
Yoga has been around for thousands of years. Yoga is a practice that started in India, and is now very popular in the United States and around the world. It has gained a lot of attention lately — maybe because it is a fun and easy way for both adults and kids to feel healthy and happy.
The word “yoga” means “union” in Sanskrit, the ancient language of India. Quite simply, yoga is the “union” or coming together of mind (thoughts and feelings) and physical body. Many people feel an overall sense of well-being when they practice yoga.
There are many aspects to yoga. In short, yoga is a sequence of physical exercises or postures (called asanas). These asanas build strength, flexibility and confidence. Yoga is also about breathing (called pranayama), which helps calm and refresh the body and mind.
Yoga for Kids
Yoga is about exploring and learning in a fun, safe and playful way. Yoga and kids are a perfect match. Here is what children (and adults!) can learn from yoga:
http://www.kidsyogastories.com/free-resources/
http://www.thekidsyogaresource.com/
http://www.cosmickids.com/
Yoga has been around for thousands of years. Yoga is a practice that started in India, and is now very popular in the United States and around the world. It has gained a lot of attention lately — maybe because it is a fun and easy way for both adults and kids to feel healthy and happy.
The word “yoga” means “union” in Sanskrit, the ancient language of India. Quite simply, yoga is the “union” or coming together of mind (thoughts and feelings) and physical body. Many people feel an overall sense of well-being when they practice yoga.
There are many aspects to yoga. In short, yoga is a sequence of physical exercises or postures (called asanas). These asanas build strength, flexibility and confidence. Yoga is also about breathing (called pranayama), which helps calm and refresh the body and mind.
Yoga for Kids
Yoga is about exploring and learning in a fun, safe and playful way. Yoga and kids are a perfect match. Here is what children (and adults!) can learn from yoga:
- Yoga teaches us about our bodies.
When we practice the physical postures or exercises (called asanas), we learn how to move more freely and with greater ease and awareness. These postures help our bodies become strong and flexible. - Yoga teaches us how to breathe better.
When we breathe deeply and fully (called pranayama) and become more aware, we can bring peacefulness or energy to our bodies. - Yoga teaches us how to quiet the mind.
When we practice yoga, we learn how to be still. This helps us to listen with attention and make good decisions. It helps us to be still and notice things about our bodies and feelings. - Yoga teaches us about balance.
When we practice yoga, we learn not only to be more physically balanced, but to be more aware about the need for balance in our lives. This could mean equal stretching on the left and right sides of our bodies or making sure we balance our very busy time with equal quiet time and relaxation. - Teaches Present Moment Awareness
- Yoga cultivates a Peaceful, Relaxed State of Body and Mind
- Yoga gives Tools for Stress Management
- Yoga encourages Social Interactions
- Yoga enhances Body Awareness
- Yoga teaches Discipline and Responsibility
http://www.kidsyogastories.com/free-resources/
http://www.thekidsyogaresource.com/
http://www.cosmickids.com/
|
Brain Breaks at Home
|
- 5-4-3-2-1: give your student a set of
exercises, eg 5 jumping jacks, 4 toe touches, 3 side bends, 2 arm circles, 1
hop.
- Rings and Bracelets: a good handwriting
warm up, students use one hand to “massage” down each finger like they are
putting on a very tight ring, then squeeze entire hand with opposite hand like
putting on a tight bracelet
- Pencil Jump: have students place their
pencil on the floor beside them and jump over with both feet, split feet, etc
- Air writing: have students write their
answers in the air, practice letter formation in the air, etc
- Cross Crawl: students raise one knee and
touch with the opposite hand, repeat with the other leg. Can also try to touch elbow to knee, or cross
behind back, touching one foot behind your back with the opposite hand
- Wiggle Set: have students bounce, wiggle,
or shake until you give a certain signal, until you say a certain word, until a
certain answer is given
- Yoga Poses: Tree, Half Moon, Table, Down
Dog
- Figure 8: students hold their thumb up,
with arm stretched out straight in front.
have them “trace” a sideway figure eight (eternity symbol) in the air
and follow their thumb with both eyes.
- Squeeze and Relax: have students squeeze certain muscles and
then relax
- Beats: have students clap, snap or stomp
a certain beat back to you, have them jump or reach to your beat
- Monster Mash: have students stomp feet in
a pattern. For example: with left foot
stomp 4 times forward, four to the left side, four to the back, cross over and
stomp four times to the right
- “Simon Says” ideas: turn in a circle, raise the roof, touch your toes, pat your head while
rubbing your belly, hop up and down 10 times, take a deep breath, march in
place, tap your toes on your chair while marching, high knees marching, stretch
your quads (heel to rear), stretch the other side quads, twist your body back
and forth, or any of the movements below:
- Calm Down:
Lead students in stretches to help loosen up tension. Have students each hold
for 15-20 seconds each: reach for the sky, touch toes, arm circles, neck
circles, knee to chest, etc.
- Train
Like a Pro: Have
students emulate various sports for 10-15 seconds each:
- kick
a field goal, shoot a jump shot, downhill ski, spike a volleyball, throw a
football, swing golf club, etc
- kick
a field goal, shoot a jump shot, downhill ski, spike a volleyball, throw a
football, swing golf club, etc
- The
Homework Workout Circuit:
Have students do the following in place for 1 minute each (feel free to mix up
the order): jog in place, high knees, jumping jacks, hop on one foot, hop on
the other foot, hop on both feet.
- Take
a Seat!: Have students
stand up and pull their chairs away from their desks. They should stand in
front of their chair (seat facing out). Have students quickly sit, then stand,
sit then stand 8-10 times. Next, quickly repeat sitting halfway down and
standing, 8-10 times. Have students barely sit (just touching chair) and stand
quickly 8-10 times.
For more ideas and/or video clips:
http://adventuretofitness.com/
www.gonoodle.com
www.youtube.com – search for David Sladkey BrainBreaks
http://teachtrainlove.com/20-brain-break-clips-keep-on-rockin/
http://teachtrainlove.com/20-brain-break-clips-fight-the-fidgeting/
http://www.youtube.com/watch?v=XSBQPFejeJs
http://www.youtube.com/watch?v=1spJn2oXNmc (start video at 0:35)
http://www.youtube.com/watch?v=5Zj01Z5mQoM (start video at 0:37)
http://www.youtube.com/watch?v=PjLr-nR8pAk
http://www.healthetips.com/jamlibrary.php?cID=1 (a library of 1-3 minute exercise sets w/o music)
What's all the fuss about pencil grasp?
|
|
The way a child holds the pencil is one of the first components of handwriting that we may address. There is a predictable progression that most children follow from using their whole fist, to holding a pencil with a tripod grasp (that is, using their thumb, index and third fingers). Therefore, it is important to give your child an opportunity to try different grasps as their muscles develop and encourage age-appropriate grasps. For efficient pencil control, OTs have for a long time looked for a dynamic pencil grasp (see photos in document to the left). The reason the dynamic pencil grasp is desirable is because the hand is positioned with an open web space (the nice circle made by the thumb and index finger) and it allows these fingers to move the pencil as required when writing. It is the preferred grasp for writing speed, control and letter formation. Some grasps are seen as functional as they have the elements desired; an open web space; pencil held by first three fingers; stability of the 4th and 5th fingers. Some grasps are inefficient as a child is compensating for a lack of stability or applying too much pressure. This usually results in fatigue, pain, compromised writing speed, lack of mobility of the first three fingers and/or stress on the joints of the hand. Can you see your child's pencil grasp below or do they have their own unique style? It is not uncommon for a child to use lots of different grasps. A pencil grip is a small foam or moulded plastic attachment to a pencil to help a child (or adult) to have a functional grasp of the pencil. There are several on the market and one size does NOT fit all. Choosing a pencil grip for your child will depend on a number of factors (including how their fingers are positioned on the pencil, movement of the fingers during writing, force exerted onto the pencil, does the child switch grasps during writing, the size of the child's hand, child's age, can they self correct their pencil grasp?). An OT can help to assess these factors! A pencil grip is a small foam or moulded plastic attachment to a pencil to help a child (or adult) to have a functional grasp of the pencil. There are several on the market and one size does NOT fit all. Choosing a pencil grip for your child will depend on a number of factors (including how their fingers are positioned on the pencil, movement of the fingers during writing, force exerted onto the pencil, does the child switch grasps during writing, the size of the child's hand, child's age, can they self correct their pencil grasp?). An OT can help to assess these factors! Pencil grips, however, are NOT the "magic pill" that will fix illegible handwriting or inefficient grasps. There are a few things inherently "faulty" about using grips: * they go missing, * children use them incorrectly whilst they are on the pencil, * they are left at home or school and so can't be used in all settings, * they do not always help with writing legibility, * they are seen as the "ultimate help" for handwriting legibility and nothing else is implemented Improving hand strength must be used in conjunction with the use of a pencil grip in order to promote lasting change. Check out the fun ways to improve hand strength below! Pictures to the left from www.yourkidsOT.com |
Fall Fun!
As the days grow colder and it gets dark so
quickly in the evening, fall is a great time to work on fun projects that focus
on fine motor skills. Practicing with paper and pencil or crayons can become
repetitious and lack excitement. Here are some fun ways to strengthen fine
motor skills at home this fall:
Clothspin Leaves – Have your child collect leaves and small sticks or branches from outside and then clip the leaves back onto the branches. Or string a piece of yarn on the mantle or doorway and have your child pin up leaves to create a festive garland.
Coffee Filter Leaves – Draw a leaf shape on a flattened unused coffee filter. Use eyedroppers or small basters to drop colored water or thinned paint onto coffee filters. Watch the paint spread to create multi-colored leaves. Hang in the window where the light will shine through.
Pumpkin Play Dough
1 cup flour
1/4 cup salt
1 tsp oil
1/3 cup water (with a few drops orange food coloring)
1 tbsp pumpkin spice seasoning
Mix all ingredients together then knead until it becomes a dough; store in a plastic bag. Have your child roll, squeeze, pinch and pull to strengthen fine motor muscles!
Leaf Mosaics
Create art while working on fine motor skills. Draw (or have your child trace) a leaf shape onto paper and then make a pretty leaf mosaic using
one of the following methods.
1. Have your child use a hole punch to create many different colored circles, then glue them to the interior of the leaf. Make sure they use their index finger and thumb to pick up the circles.
2. Have your child tear small pieces of paper, again using their index finger and thumb to grasp the paper to tear. Glue to the leaf shape.
3. Have your child cut small squares from various fall colors of craft foam. For younger kids, they can snip on skinny strips that you have already cut.
4. Use a paintbrush or Q-tip to “paint” on the glue.
Fall Tree Paintings - Tear paper, trace or draw a tree trunk and branches onto a piece of paper. Have your child use Q-tips, mini marshmallows or corks to dip in paint and then “stamp” leaves onto the tree.
Leaf rubbings – Collect leaves from outside. Tape leaves to counter or table. Place paper on top of leaves and tape to counter. Use crayon to color over top of paper tocreate leaf rubbings.
Make a pipe cleaner tree – collect several pipe cleaners, fold them all in half together and twist to make the “trunk.” Spread apart the tips of the pipe cleaners to make the “branches.” Add small pony beads or buttonsto make the “leaves.” To get the tree to stand up by itself when complete, stick the trunk in a small ball of playdoh or clay and let dry.
Leaf spray prints – collect leaves from outside (if time, press for a day in between the pages of a book). Lay leaves on top of paper. Use spray bottle filled with thinned paint to spray over leaves and paper. Remove leaves and you will have created a unique negative leaf print. Using spray bottles develops the muscles used for cutting!
Pumpkin Fun-Cut open those decorative pumpkins and have kids pick out the seeds with tweezers or hammer golf tees into pumpkins or use push pins to make designs.
Remember to encourage your child to use a good tip pinch (index finger and thumb) when picking up small items and to use a tripod grasp (thumb,
index and middle finger with a rounded opening between the thumb and index finger) when coloring, drawing, tracing or using tongs, Q-tips, eyedroppers or tweezers.
Fun Ways to Strengthen the Muscles of the Hand
* Use a squeeze bottle of water to clean the house or car
* Use a squeeze bottle of paint to create a picture (outside, of course!) * Cut a slit in a tennis ball to make a puppet that talks or eats Cheerios |
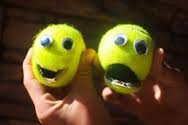
A tennis ball in each hand is twice the fun!
|
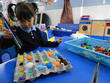
* Fill up trays with pom poms or small stones
* Pick up game pieces to move around the board using tongs
* Pick up food (salad fixings) during dinner
* Play Operation (board game that uses tongs)
* Cut Play Doh
* Cut felt paper
* Cut index cards
* Cut felt paper
* Cut index cards
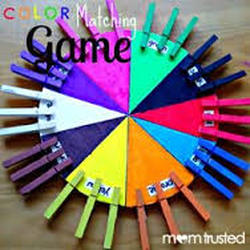
* Play matching games using clothespins
* Hold playing cards using clothespins
* Write the letters of the alphabet on a clothespin. Put the letters in order going down a drapery edge.
* Hold playing cards using clothespins
* Write the letters of the alphabet on a clothespin. Put the letters in order going down a drapery edge.
Zones of Regulation
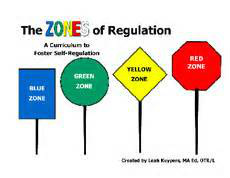
We are excited to introduce a new program to our students this year called "Zones of Regulation." Self-regulation can go by many names, including self-control, impulse control or self-management. It is defined by the ability to maintain the best state of alertness of the body and emotions for a given activity. For example, if playing a game of tag out on the playground, a heightened state of alertness may be appropriate, however, this same level would not be appropriate inside in the library. The lessons and activities provided in the Zones of Regulation curriculum serve to arm the student with the ability to determine what “Zone” they are in, as well as learn strategies to help them stay in or change their Zone. In addition to addressing self-regulation, the students will gain:
* an increased vocabulary of emotional terms
* skills in reading other people’s facial expressions
* perspective about how others see and react to their behavior
* insight into events that trigger their behavior
* calming and alerting strategies
* problem solving skills
There are four different zones: Blue (i.e. sleepy, sick, bored), green (i.e. happy, ready to learn, calm), yellow, (i.e. frustrated, worried, silly), and red (i.e.hitting, yelling, mad, out of control).
For more information, please visit www.zonesofregulation.com or contact your school’s Occupational Therapist.
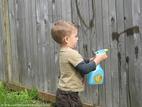
Outdoor Sensory Play
Shaving Cream Ice Skating
-Need: Plastic painting tarp, stakes, shaving cream, spray water bottle, bucket of clean water, towels
-Stake down the tarp on each corner, spray with shaving cream, and spray all over with water bottle. Have the kids skate around and spray as shaving cream starts to dry out (women's works best). Use bucket of water and towers to clean feet when finished!
Chalk Play
-Need: Chalk, water, sponges
-Have children explore with dipping chalk in water to draw, drawing with sponges, or wipes down chalk with sponges to create!
Sprinkler water play
-Need: Water hose, sprinkler
-Lots of kids struggle with unpredictable touch. Running in and out of the sprinkler is a great way to work on this!
Mud soup
-Need: Water, dirt, sand toys (old tupperware work), buckets
-Fill a few buckets half way with dirt, add water water and explore!
Rock painting
-Need: rocks, acrylic paint, paint brushes, water
-Have children search for rocks, paint, and dry. Makes a cool present or garden decor for years to come!
Body painting
-Need: shaving cream, washable paint
-First make a pile of shaving cream-in an empty pool works best. Add paint-not too much, and encourage children to swirl and explore painting themselves. Shouldn't stain, but an old swimsuit would be best to wear!
Spring is around the corner, so take advantage of all the activities you can do with your child indoors and outdoors. Explore these sensory experiences and fine motor activities by engaging in these fun
activities.
Fine Motor Activities for Spring Time
Pine Cone Bird Feeder and Spreading with a Knife
Spreading can be a challenge for many children, so here is a fun activity that helps practice. You use a pine cone and attach a wire or string to the top of it so that you can hang it once it is finished. You then spread peanut butter all over the pine cone. It can be messy, and obviously not an activity for
someone who is allergic to peanuts, but alternate butters can be used, such as sun butter (made from sunflower seeds), cashew butter, almond butter,
etc. Once the peanut butter is spread, you roll and press the pine cone in bird seed. You want it well covered in seeds. Then you hang it outside on a
tree. The birds will love it and you had fun practicing necessary skills.
Materials:
Pine cone (can use a paper towel roll too)
Peanut butter (or other type of nut butter)
Wire or string
Dull knife for spreading
Bird seed
Tying Ribbon to Make a Spring Tree
taken from http://therapyfunzone.com/blog/ot/fine-motor-skills/
I started with some pipe cleaners, and attached them together to make what looked like branches. Then I tied pink ribbon on to the branches to look like cherry blossoms. One student that I was working with had great trouble tying the ribbon, so I tied pink and green ribbon together to make the ends two different colors. This two color contrast made it much easier to tie, and was still pretty with the spring green color and pink together. I still needed to hold it in place for him while he tied, but he had much more success with the dual colors. Once the ribbons were tied onto the tree branches, we cut them short so
that they looked more like blossoms.
Materials:
Pipe cleaners
Ribbon (pink and green)
Handprint flower
Have the child trace their hand on construction paper and cut it out. Once the hand is cut out, use a pencil to roll up each finger to make it curly. Get a straw and wrap the base of the hand near the end of the straw with the curls facing out and secure with tape. Have the child cut out 2 leaves from green
construction paper and tape lower on the straw for the stem of the flower. Taken from - http://blog.abcpediatrictherapy.com/2012/03/07/fine-motor-activities-for-spring.aspx
Butterfly coffee filter
Flatten a coffee filter out and have your child color it with markers. When coloring is complete, spray the filter with a water spray bottle 2-3 times so the colors blend. Let dry. Once it is dry, pinch the filter in the middle and wrap a pipe cleaner around it 2 times. Curl the ends of the pipe cleaner for the
antenna. Taken from - http://blog.abcpediatrictherapy.com/2012/03/07/fine-motor-activities-for-spring.aspx
Fun Spring Fine Motor Activity
Tactile- Finger paint the blue sky.
Scissor Skills-Cut a toilet paper role in half. Snip the construction paper to make the grass.
Fine motor-"Scrunching" the tissue paper to make the tree leaves.
Gluing Skills- Glue on the t.p. roll, grass, and tissue paper leaves.
Fine motor- Peel the paper off of the butterfly and sunshine stickers, then place them on the picture.
http://drzachryspedsottips.blogspot.com/2012/05/fun-spring-fine-motor-activity.html
Make a Daisy Chain
Next time you're at the park (or anywhere that has daisies), pick 7-10 daisies, picking them so that there is at least 2 inches of stem at the bottom. Slit the
stems with your fingernail, pull one stem of one daisy through the stem of another and repeat until you have a daisy string or a daisy chain. Have fun with
the daisy chain, making a crown out of them or a necklace or anything that strikes your imagination.
http://www.savvysource.com/activities/activity_bm_603_make-a-daisy-chain
Spring Time Sheep
Purpose: This activity encourages fine motor skills, bilateral skills and tactile input.
Materials: oval cardboard, marker, yarn, clothes pins or mini clips and cotton balls (Optional: tweezers)
Step 1: Draw an eye and mouth on the oval cardboard. Attach clips or clothes pin as the legs. Cut two small slits at the front and back of the oval cardboard to start and stop the yarn.
Step 2: Wrap the string around the oval cardboard many times. Be careful to wrap yarn up and down using the clothes pins to
separate versus horizontally or the yarn will slip off the sheep body.
Step 3: Pull the cotton apart. Stuff under the yarn.
Step 4: Sheep is complete.
Step 5: Optional: Using another clothes pin or tweezers, "shear the sheep" by removing the cotton balls from
under the yarn.
http://www.yourtherapysource.com/
Sensory Activities
Slides Slides help in the development of the vestibular system, as the body is in motion and the head can be placed in different positions. It is also a great motor activity, as it requires the child to climb the stairs of the slide, balance on one foot and shift his weight during stair climbing.
Climbing Wall Climbing a rock wall is great practice for coordination of the upper and lower extremities, as the child has to figure out where to place his
hands and feet, and in what sequence. The wall also helps the child develop his upper body and finger strength. Some playgrounds have moveable structures to climb (for example, made out of rope or chain link), which require even greater coordination skills and balance, as the body is required to shift its weight accordingly as the structure moves. Both of these activities also provide proprioceptive input to the joints and muscles.
Tubes Children can crawl through tubes on all fours, in a bear crawl or in the crab walk position. This helps a child develop core strength and body oordination skills.
Swings Swings
are a great source of vestibular input, as the body is in motion while the feet are off of the ground. Pumping your feet also helps to develop sequencing
and motor coordination skills.
Monkey Bars Monkey bars help to develop upper extremity and hand strength, as well as coordination. If the child hangs upside down on the monkey bars, it also provides great vestibular input!
See Saw The see saw requires coordination, sequencing and cooperation of two children at the same time in order to make the see saw move. Balance and core and upper body strength are required to hold oneself up on the see saw.
Spring Rider A spring rider is a seat on a spring that rocks back and forth. It provides great proprioceptive input into the body’s joints, as well as
vestibular input while the body is in motion and the head is placed into different positions. A child also needs to coordinate his body movements in order to make the spring rider move, and core and upper extremity strength is required to hold on to the rider.
TextureWalk Take a texture walk with your child or children. Use the outdoors to take advantage of an excellent learning opportunity for your little ones. Take a walk and look for things that are soft like sand, dirt, etc. Look for pine cones or rocks that are hard and rough or smooth. Look at tree leaves or flowers that are smooth, flat or detailed. The conversation can lead into different discussions about textures and nature. Loads of fun and the kids love looking and discovering. You will be amazed at how much excitement this activity produces.
Magic Mud
Supplies: A big box of corn starch, food coloring, several bowls, water, spoon
Activity Detail: This is a fun and messy project for kids. Get out as many bowls as you want colors. Fill each bowl with a several heaping spoonfuls of corn starch, mix with a little water and food coloring. Keep adding water until it's soupy. If you let it sit even for a second it will start to harden, as soon as it gets moved with hands or spoon it liquefies again. Great tactile fun!
Rainbow Stew
Supplies: Cornstarch, sugar, water, food coloring, medium saucepan, mixing spoon, sandwich-size ziploc bags
Activity Detail: Stir together 1 cup cornstarch, 4 cups water, and 1/3 cup sugar in a medium saucepan. Heat on the stove until thick. Remove
from heat and wait for it to cool. Pour the mixture into sandwich-size ziploc bags, filling each one halfway. Scatter drops of different food coloring into
each bag, and have the kids squish the bags to turn the mixture different colors.
Gelatin Sun Catchers
Boil 3 tablespoons of water and add an envelope of unflavored gelatin (such as Knox). Pour into a bowl or measuring cup. Add any coloring you would like and stir. Pour onto plates and add embellishments such as glitter and/or drops of a different color and swirl for a marbling effect. Now the article says let dry overnight, that was not the case for us! We started this project on a Friday morning and they were not completely dry until Monday. I could tell that they
were dry when they started peeling off the plates. The middles and edges started buckling and the edges became dry and pulled away from the sides of the plate. They felt very similar to overhead projector sheets. I cut each circle in half Punching holes to hang the pieces.
Taken from http://www.dillydaliart.com/2011/04/gelatin-sun-catchers.html
April is Occupational Therapy Month!
Check out the attached document to learn more about occupational therapy, its role in the school system, and signs that might indicate a student needs an OT consultation.
Also, do you have questions about how to improve your child's handwriting at home? Or would you like to learn more about sensory integration and how you can meet your child's sensory needs at home? White Lick Elementary school will soon have a Handwriting Resource Bag and a Sensory Integration Bag that can be checked out to bring home! These valuable bags will have resources, activities, and books to assist your child in these areas.
Valentines Day Fun-tivities
- Sensory Jar - In a jar with a tight fitting lid, mix 1 tablespoon of glitter glue with 1 cup of hot water. Add your favorite food color and a tablespoon of glitter. When all the glitter settles at the bottom, turn the jar over and start again.
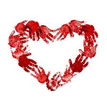
- Cut out heart by folding construction paper or paper doilies in half and drawing 1/2 of a heart.
- Instead of writing out all the Valentines at once, break it into smaller chunks in order to work on correct letter formation and legible handwriting.
- Scrunch small squares of tissue paper into little balls. Glue on a construction paper heart.
- Use a strawberry huller or small tongs to pick up pompoms to decorate your paper heart.
- Place 2 hearts together and use a single hole punch to make holes around the sides and bottom of the heart. Use yarn, string or shoelaces to lace the hearts together to form a pouch for goodies.
- Visit some of our favorite websites for worksheets to practice letters and writing such as www.education.com (free membership), www.activityvillage.co.uk.com, http://www.dltk-holidays.com/valentines/worksheets.htm. Pinterest is also a great resource for craft and worksheet ideas!
Using Write:Outloud to extend student writing

Write:Outloud is a text to speech software program. In this software program, students are able to hear back what they type. Each word is spoken as it is written (after the space bar is pressed) and each sentence is spoken after punctuation is placed. The purpose of this program is to provide students with auditory feedback on what they are writing. This assists students with spelling and grammar errors, as well as hearing sentence structure. Information can also be typed on a portable word processor or in another word processing program and then cut and pasted into Write:Outloud. Various tools can then be used to listen to the written text and edit the student's writing.
For more information on this program, check out http://donjohnston.com/ for this and more assistive technology software to help making writing easier for the struggling writer.
For more information on this program, check out http://donjohnston.com/ for this and more assistive technology software to help making writing easier for the struggling writer.
C0-Writer for the challenged writer
Co-Writer is a word prediction program that provides students with assist generating ideas and success with spelling. This program can be used while writing a document within word. After typing a few letters, Co-Writer will give you 4 options of words and the ability to scroll through for more options. When you find the word you need, just press the number, and the program automatically spaces over for the next word.
There are several other options within the program. You can select the “topics” tab get a topic or add a topic, with specific vocabulary, from the internet. For example, if a student wants to write about dinsours, he can find a web page with generous informaion (i.e. Wilkipedia) and cut and paste this information. . Adding in common or unique words is also an option. Another huge benefit for students is the text can be spoken out loud as they type, and the full sentence can be read back if needed, making it easier for students to proof-read their work. All the settings can be saved so a student doesn't need to re-create these options everytime they log in.
For more information on this program, check out http://donjohnston.com/ for this and more assistive techonology software to help making writing easier for the challenged student.

The Holidays can be a stressful time for those with sensory processing Differences. See below for things to try if your child struggles at this time of year.

Below you will find articles from the Indiana Resource on Autism regarding going on a holiday trip and getting read for New Year's.
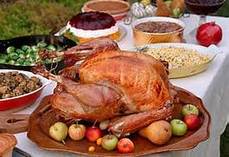
Thanksgiving for the "picky" eater
Hard to believe anyone is not a fan of Thanksgiving dinner, but
the thought of the variety and amount of food can be distressful to some children. Below are some tips to help the picky eater still be part of Thanksgiving dinner without the dreaded meltdown!
Hard to believe anyone is not a fan of Thanksgiving dinner, but
the thought of the variety and amount of food can be distressful to some children. Below are some tips to help the picky eater still be part of Thanksgiving dinner without the dreaded meltdown!
- Read books about Thanksgving that involves prepartion of the food-Curious George's Thankgiving is a great example!
- Have your child help be part of the preparation, even if its as small as folding napkins.
- Let them pick their seat next to their favorite aunt or cousin, even if its not at the pre-designated kids table. If its someone they really admire/don't get to see often, they may try something just because they are!
- Seat them at the end or where there is limited/less food in their area so they are less anxious and distressed.
- Be flexible on what goes into Thanksgiving dinner. If they are agreeable to trying mashed potatoes if they are smoothered in ketchup, go for
it! - Keep pre-snacks to a minimum so they aren't full for dinner.
- Have a taste test before hand, such as trying out sweet potatoes a week before if they've never had them.
- Give food fun silly names, perhaps after a favorite TV show.
- Its ok if they play with their food-kids won't eat what they won't touch, (just don't sit them next to a disapproving Grandmother!)
- Most importantly, don't yell and threaten them-the holidays are already stressful enough!
Cut screen time and get back into PLAY
Nearly two in five children have used a tablet or smartphone before they could speak in full sentences, according to a new report.
Conducted by family advocacy organization Common Sense Media, the study (published 10/28/2013) found that 38% of children under the age of 2 have used a mobile device for playing games, watching videos or other media-related purposes. In 2011, only 10% had.
Not only are more children using tablets and smartphones, they’re using them forlonger periods of time. The amount of time spent using these devices tripled:In 2013, children ages 0 to 8 spent an average of 15 minutes a day using mobiledevices; that’s up from 5 minutes a day in 2011.
Technology is a great tool, when used to promote educational opportunities and when screen time is limited. However, we are finding that many children are moving away from traditional play. Typically these days, if it doesn't light up, talk back to you, play music or require the downloading of an 'app', it is not the 'coolest' toy or activity. The fun and exciting things that have entered our world of play in the form of technology is amazing, however by partaking less in the toys that require imagination, manipulation, and self-generated play our children are growing up with weakened developmental skills. Intellectually,
emotionally, academically, physically -- any way you cut it, imaginative play is good for our children. And not just for toddlers and pre-schoolers, but for
school age kids too.
Games that encourage problems solving, manipulation and imagination are staples forbuilding relationships, creative thinking, flexible thinking, self-regulation and language skills. Be sure to balance your child’s screen time with the following “old school” play:
-Building with blocks (LEGO/Duplos, wood blocks, Trios, pop beads, Kinetx, Lincoln Logs,Magnetix) as well as stacking (boxes, groceries, jelly packets at a restaurant, books, etc)
-Outdoor gross motor play
-Indoor gross motor games like obstacle courses, Twister, Cranium’s Hullabaloo, makingforts out of tables, sheets, boxes
-Encourage imaginative play with a dress up bin, doll houses, cars and tracks, marbleruns, instruments, play doh, art supplies, toy kitchen
supplies/food
-Encourage responsibility, creativity and curiosity by having children help cook or make their own snacks or by doing homemade science experiments
Even in the educational world right now, we all want the best apps! While there are many apps that can teach cuase and effect, a variety of
academic skills and help students with things like scheduling and organization, one of the best things that your child can continue to do
is engage in creative and gross motor play. And remember that one of the best toys is you! Try to encourage everyone to turn off their devices and get into the action!
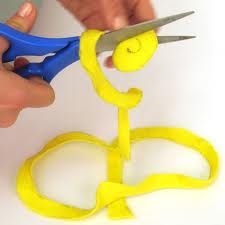
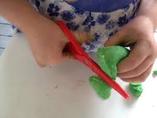
Struggling with Scissors
Using scissors correctly will help a child in the areas of visual perception, strengthening, fine motor
manipulation and using both hands in a coordinated manner. As OT's, we highly promote scissor skills
because we know the benefit they provide for grasping a pencil, tracking sentences when reading and writing, and supporting hand endurance for sustained writing. As parents, the benefit of scissors can be found in the fun you can have!!
There are a variety of scissor styles from those that are easier to manage (loop scissors) to standard scissors. Be sure to find the type that works best but plan on progressing to standard school scissors quickly! If your child is left handed, they need to use left handed scissors. Some scissors are marketed as appropriate for either hand. Look at the blades of the scissors which determine the handedness. Left handed scissors have blades that are the opposite of right handed scissors.
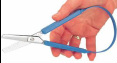
Loop Scissors allow the fingers to be on the outside of the handles. This offers more power since it uses a whold hand grasp.

Self-Opening Scissors are a good transition to standard scissors and are easy to find in your local discount stores. You can have the self-opening switch on and off. When on, the child uses her/her fingers to close the scissors and the spring will open them automatically.
Tongs and medicine droppers are a fun way to increase hand strength if scissors are too difficult. For small hands, you might want to try a strawberry huller from the grocery store. They are an easy way to start picking up items using just the thumb and first two fingers.
Some fun activities for scissors:
- Cut circles from paper plates and attach to a craft stick to make puppets.
- Cut straws into sections and string for a necklace.
- Cut coupons out of the paper together.
- Cut Playdoh into a variety of shapes and sizes.
- Get paint chip cards and cut between the colors to make a mosaic picture
- Cut straight lines and then progress to curved lines and zigzag lines.
- Cut a variety of textures such as aluminum foil, cardboard, fabric, foamboard, sandpaper, or cookie dough to experiment with how it feels.
Fall time!
As the days grow colder and it gets dark so quickly in the evening, fall is a great time to work on fun projects that focus on fine motor skills. Practicing with paper and pencil or crayons can become repetitious and lack excitement. Here are some fun ways to strengthen fine motor skills at home this fall:
Clothspin Leaves– Have your child collect leaves and small sticks or branches from outside and then clip the leaves back onto the branches. Or string a piece of yarn on the mantle or doorway and have your child pin up leaves to create a festive garland.
Cut open those decorative pumpkins and have kids pick out the seeds with tweezers.
Hammer golf tees into pumpkins or use push pins to make designs.
Coffee Filter Leaves– Draw a leaf shape on a flattened unused coffee filter. Use eyedroppers or small basters to drop colored water or thinned paint onto coffee filters. Watch the paint spread to create multi-colored leaves. Hang in the window where the light will shine through.
Pumpkin Play Dough
1 cup flour
1/4 cup salt
1 tsp oil
1/3 cup
water (with a few drops orange food coloring)
1 tbsp pumpkin spice
seasoning
Mix all ingredients together then knead until it becomes a dough; store in a plastic bag. Have your child roll, squeeze, pinch and pull to strengthen fine motor muscles!
Leaf Mosaics
Create art while working on fine motor skills.Draw (or have your child trace) a leaf shape onto paper and then make a pretty
leaf mosaic using one of the following methods.
1. Have your child use a hole punch to create many different colored circles, then glue them to the interior of the leaf. Make sure they use their index finger and thumb to pick up the circles.
2. Have your child tear small pieces of paper, again using their index finger and thumb to grasp the paper to tear. Glue to the leaf shape.
3. Have your child cut small squares from various fall colors of craft foam. For younger kids, they can snip on skinny strips that you have already cut.
4. Use a paintbrush or Q-tip to “paint” on the glue.
Fall Tree Paintings- Tear paper, trace or draw a tree trunk and branches onto a piece of paper. Have your child use Q-tips, mini marshmallows or corks to dip in paint and then“stamp” leaves onto the tree.
Leaf rubbings– Collect leaves from outside. Tape leaves to counter or table. Place paper on top of leaves and tape to counter. Use crayon to color over top of paper tocreate leaf rubbings.
Make a pipe cleaner tree – collect several pipe cleaners, fold them all in half together and twist to make the “trunk.” Spread apart the tips of the pipe cleaners to make the “branches.” Add small pony beads or buttons to make the “leaves.” To get the tree to stand up by itself when complete, stick the trunk in a small ball of playdoh or clay and let dry.
Leaf spray prints– collect leaves from outside (if time, press for a day in between the pages of a book). Lay leaves on top of paper. Use spray bottle filled with thinned paint to spray over leaves and paper. Remove leaves and you will have created a unique negative leaf print. Using spray bottles develops the muscles used for cutting!
Remember to encourage your child to use a good tip pinch (index finger and thumb) when picking up small items and
to use a tripod grasp (thumb, index and middle finger with a rounded opening between the thumb and index finger) when coloring, drawing, tracing or using tongs, Q-tips, eyedroppers or tweezers.
Make Homework Successful.....not Stressful! (9/27/2013)
Have you ever sat down to help your child work on homework, just to think "Not spelling practice again"? Or do you dread trying to get your child to sit still
and focus just to finish one worksheet? Check out the tips below to help get your child "in sync" to work on homework and new ways to practice writing
without pencil and paper. Happy Homeworking!
Prepare for it: Your child has already spent the day sitting in a chair doing work. Try the following tips to get them set to start.
1. Kids perform best academically when they have some type of physical activity. That is, be active BEFORE homework,too. What works best
in your house for a 15-20 minute warm-up? Shooting some hoops, a trampoline, jumping rope, yoga, dancing, Wii sport, etc. Make a checklist. Be sure to have indoor and outdoor ideas for bad weather days. Also be sure to include a hydration reminder on the checklist.
2. Chewing gum can help focus and concentration. Get a large jar, fill it up and put it on the shelf in the Homework Zone. Crunchy and chewy snacks can also help (fruit leather, apples, carrots, chewy granola bars, bagels, licorice, beef
jerky for example).
3. An active body yields an active mind. Some students focus and increase work productivity when sitting on an under-inflated beach ball, a "wiggle seat" or a ball chair.
4. Music can help with concentration, work productivity, thinking and learning. Scientifically selected concentration music works for most people.
Sometimes your child will insist that their music is really best for homework. Some people benefit from a metranome, ticking away at 60 beats per minute. If you try these suggestions, observe and monitor what works best for your child.
Set the scene: Make sure your child has a consistent, sensory-friendly area to work. Be sure that your child does their homework in the same place each night. Good lighting is essential. Invest in a small desk lamp. Be sure that the area is free from distractions and has their needed supplies. Use a box with the top and one side cut off to create an "office" space that will sheild visual distractions. The use of headphones or earplugs may improve focus by weeding out extraneous noise. Have bins with needed items (calculator, ruler, pencil for math, pencil, notebook, eraser, thesaurus for writing). Incorporate organizational supports if needed (checklists, timers, calendar for due dates, accordian file to keep track of papers). A weighted lap pad or sock could be used on the child's lap to help keep them still in their seat. A fidget (stress ball, koosh ball, play-doh, velcro) could also be used to keep hands busy and calm when studying.
Change it up: Here is a list of 12 different ways to practice spelling or writing that do not involve pencil and paper. Have fun!
Paint with water- Dip a Q-tip in water and practice spelling the words on a chalkboard. The words will disappear like magic!
Shaving Cream Practice- Have the students practice their spelling words in shaving cream spread on a table or cookie sheet
Scratch and Sniff - Write letters with glue on paper and then sprinkle with kool-aid or jell-o. Makes super scratch and sniff when tracing over letters.
Finger Paint Bags - Place a large blob of fingerpaint inside a freezer strength zip lock bag and seal. Use as a slate to write without the mess.
Disappearing Act - Write with chalk on black paper, spray with water and watch disappear.
Spelling Magic - Write words on white paper with white crayon, then paint over the paper and watch the words appear!
Air Writing - have the child use their pointer finger to write words in the air
Body Part Writing - have the child use their pointer finger to write words on your hand, top of your head, back, up your arm
Q-tip writing - use a Q-tip dipped in paint to write words on paper, or use Q-tips to erase words in chalk on chalkboard, or marker on dry erase boards
Tissue Paper Tracer - an adult writes the words on regular paper and then the child can lay tissue paper over the top and use markers to trace
Pudding Practice - use a pudding snack smeared on a plate and a pointer finger (or straw/Q-tip for those who don't like mess) to write
Twist tie Spelling - use twist ties, Wikki Stix or pipe cleaners to form out the letters to spell words
